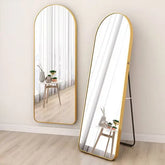
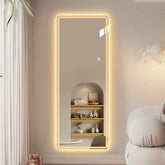
How to frame a full-length mirror: A complete DIY guide from cutting to assembly
 A beautiful large floor mirror can not only enhance your outfit, but also beautify your home space. Adding a frame to the mirror can not only increase stability, but also make it more decorative. If you have a frameless mirror, you might as well try this DIY method to create a "framed, art-like" full-length mirror.
🛠 Materials and tools required:
Frameless floor length mirror (such as 60"x20")
Wood strips or solid wood boards (for frames)
Circular saw / hand saw
Electric drill and screws
Woodworking glue / strong structural glue
Sandpaper / paint (optional)
Glass cutter (if you need to cut the mirror)
Goggles (necessary when cutting glass)
📏 Step 1: Cut the mirror (if necessary)
If your mirror is too large:
Use a glass cutter to score: score the cut along the required size.
Break the mirror: Place the mirror on the edge of a table or place a 2×4 wood strip under the score line and apply pressure to break it.
Wear goggles and gloves to prevent glass from flying.
🪵 Step 2: Frame size design and cutting
This design is a "trapezoidal" frame, extending 6 inches up and down, which is more unique.
➤ Vertical wood strips (two):
Length = mirror height + 12 inches
For example: If the mirror is 60" high, the wood strips need to be cut to 72".
➤ Horizontal wood strips (two):
Length = mirror width - 0.5 inches
Because the large floor mirror is embedded 0.25" on each side, each side should be shorter.
For example: if the mirror is 20" wide, the horizontal wood strips should be cut to 19.5".
🪚 Step 3: Slot and embed the mirror
In order to allow the large floor mirror to be firmly embedded in the frame, each wood strip should be slotted with a depth of 0.25 inches and the same width as the thickness of the mirror:
Adjust the depth of the circular saw to 0.25 inches;
Cut the groove along the inside of the wood strip (pay attention to the same direction);
Use sandpaper to polish the edges to ensure that the mirror is placed flat and without burrs.
🧩 Step 4: Test assembly
Put the full length floor mirror into a long wood strip, and then put in the remaining three side wood strips one by one.
Make sure the standing mirror fits tightly in the slot and the wood strips are aligned and flat.
This step is a bit like a "jigsaw" and can be operated flat.
🔧 Step 5: Fix and reinforce
Use wood glue or structural glue to fix the full length floor mirror in the groove.
Use angle brackets or screws to join and reinforce the four frames;
If you need to hang it on the wall, you can install a hook on the back;
If it is a floor mirror, you can add a bracket or support foot.
🎨 Step 6: Decoration and stylization (optional)
It can be painted, waxed, and aged according to the style of the home decoration;
Original wood, black walnut, white or metal are very suitable for modern or retro style matching.
✅ Tips:
If the standing mirror is large or heavy, it is recommended to use solid wood instead of plywood;
The three-sided mirror design can also imitate the above method, and install three frame mirrors separately to assemble into a "folding" perspective;
If you are afraid of trouble, you can also customize the frame strips and install them yourself.


